Artisan Challenge - Week 1
In an effort to improve my leatherworking and 3D printing skills, I started a 30 day artisan challenge. These are the projects from week one.

I've come across a number of "30 day challenges", but they're typically centered around something like coding, writing, or fitness. Since I have trouble thinking of random projects to work on, but still want to improve my skills around design, fabrication, and leather, I figured I'd try creating a challenge centered around that.
The idea would be to start small with basic techniques and work my way up. At the end of 30 days, I should have one or more completed projects using a combination of the techniques I practiced.
So how did I come up with the challenge tasks, if I have trouble thinking of projects? Well...I used AI for an outline with the following prompt
I've found several "30 day challenges" for things like coding, writing,
etc, but not for artisan-based work such as leatherworking.

I want to improve my skill when it comes to combining leatherworking, 3d
modeling, and 3d printing. I have both an FDM and resin printer.

Create a 30 day challenges that progressively increases my skill and the
things that I can make using those three disciplines.

For example, different 3d models could be created in freecad or blender to
focus on different processes and tools. Different types of stitching could
be practiced, such as a saddle stitch, cross stitch, etc.

Over time, these skills will be combined into projects such as key chains,
deck boxes, miniatures, hand bags or tool cases, etc.
The result was pretty decent over all, but I think I'll probably modify a couple of the suggestions as I go.
Day 1: Saddle Stitch
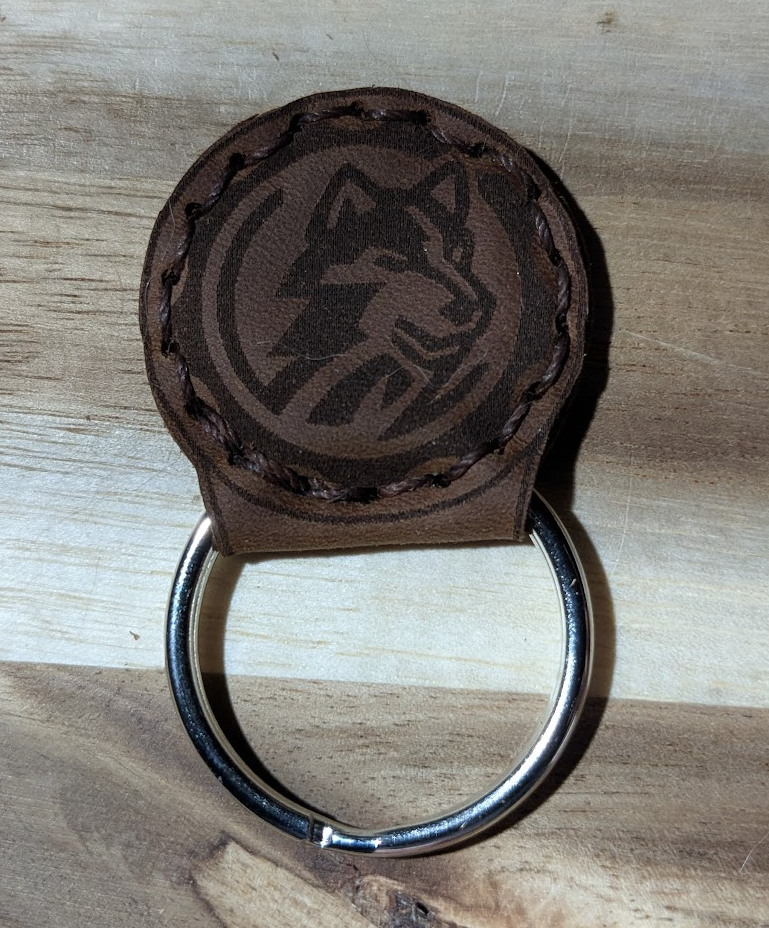
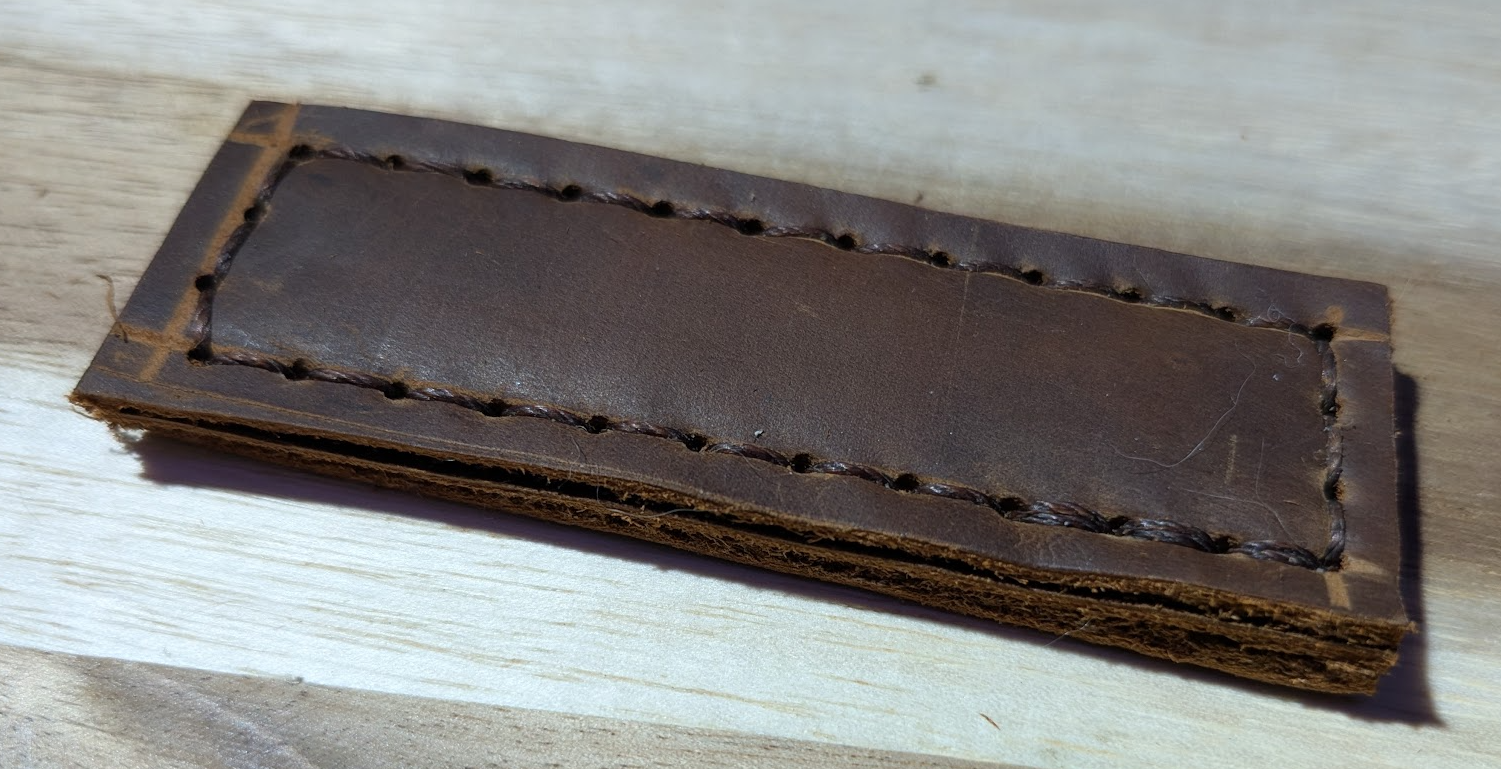
Day one consisted of practicing the saddle stitch on a couple scrap pieces of leather. I also laser engraved my logo on a piece of leather, so I attempted to stitch that for a key chain. Unfortunately the dimensions were a bit off on the key chain, but at least it's functional!
Day 2: Edge Groover Guide
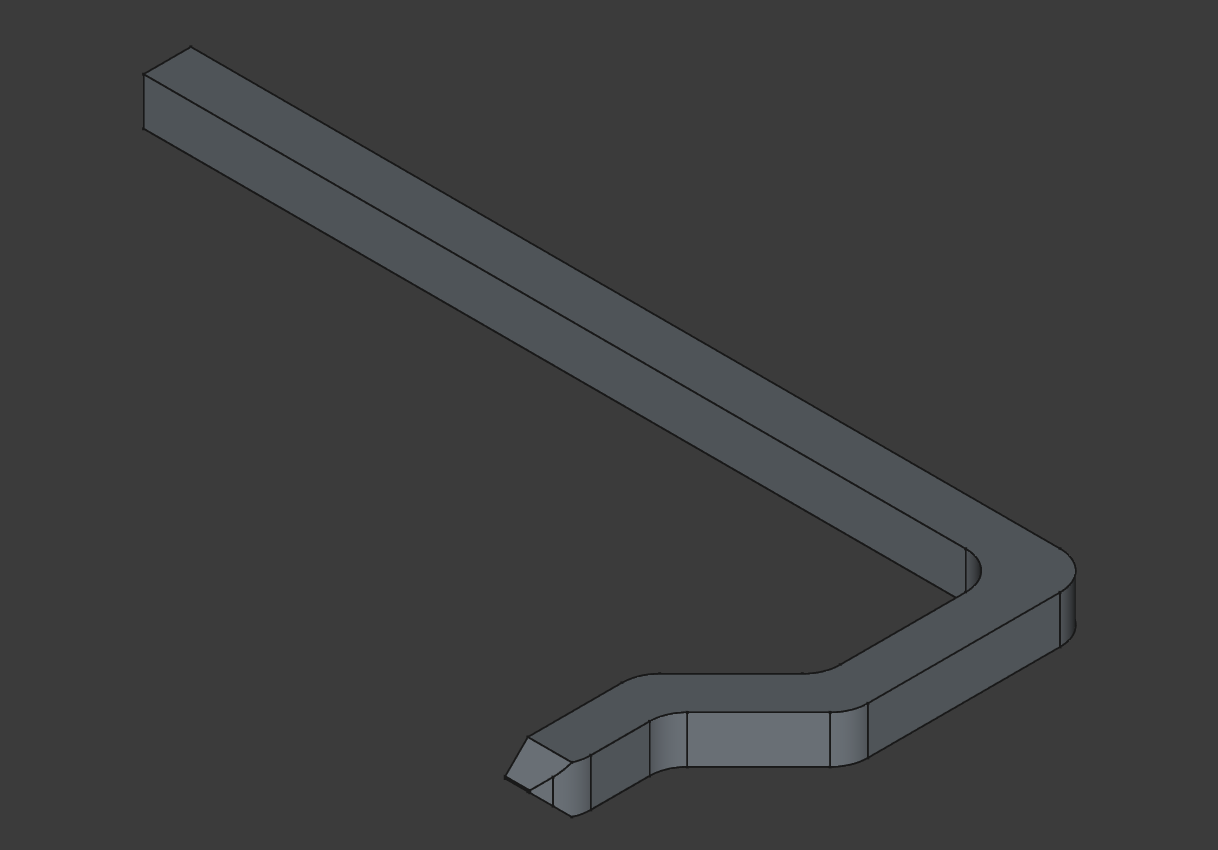
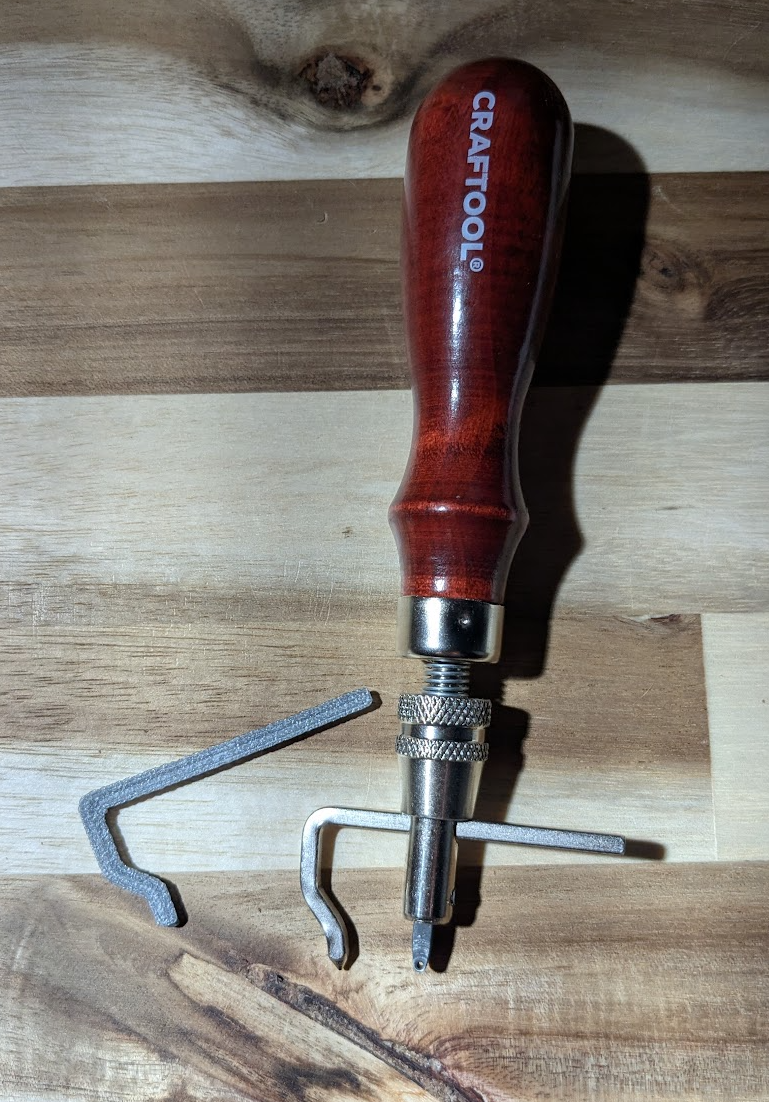
On day two, I designed and 3D printed a guide for my Edge Groover
Day 3: Edge Grooving + Saddle Stitch
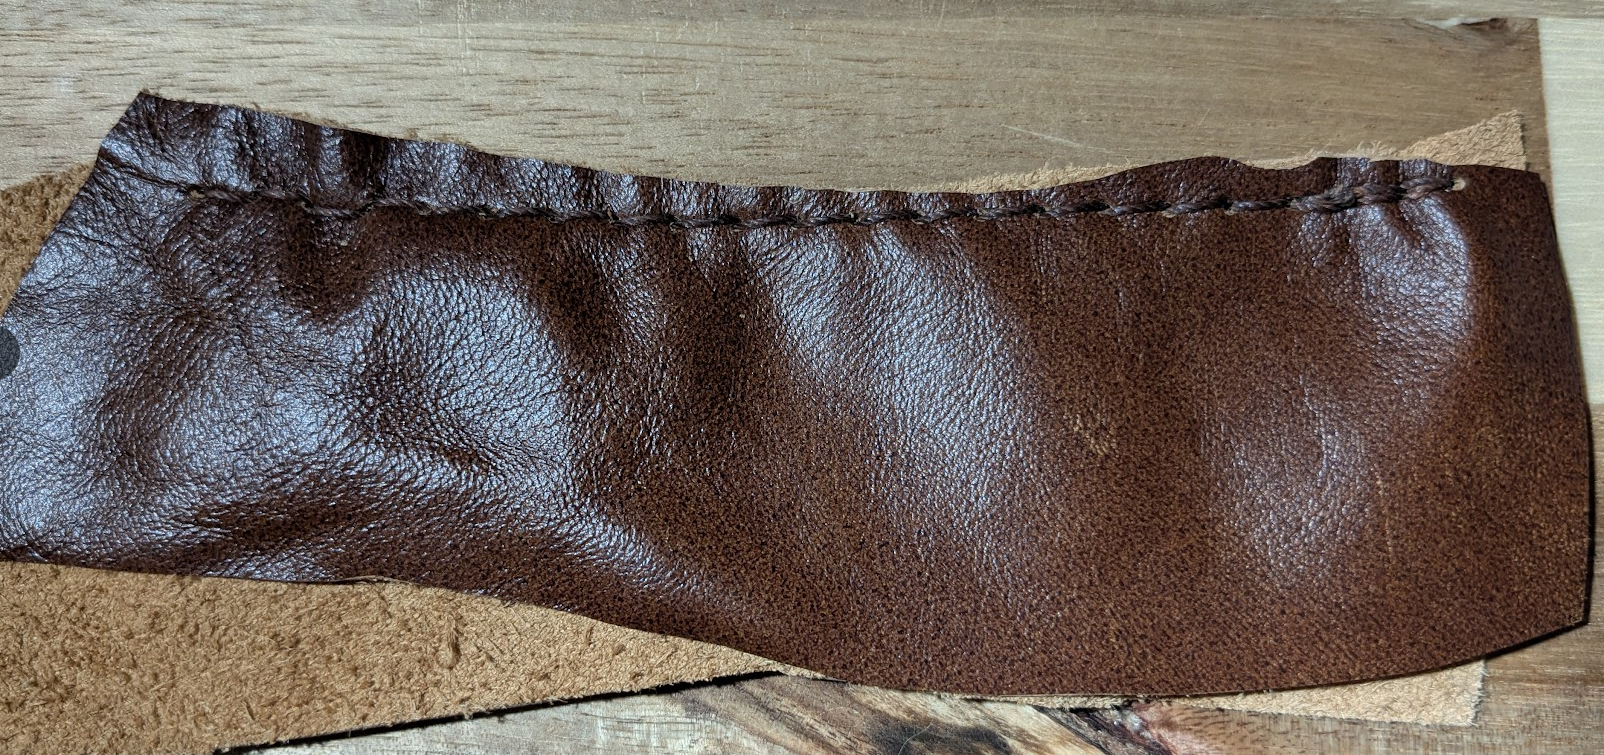
Day three consisted of additional saddle stitch practice - this time using thicker leather and the edge groover to keep my lines straight.
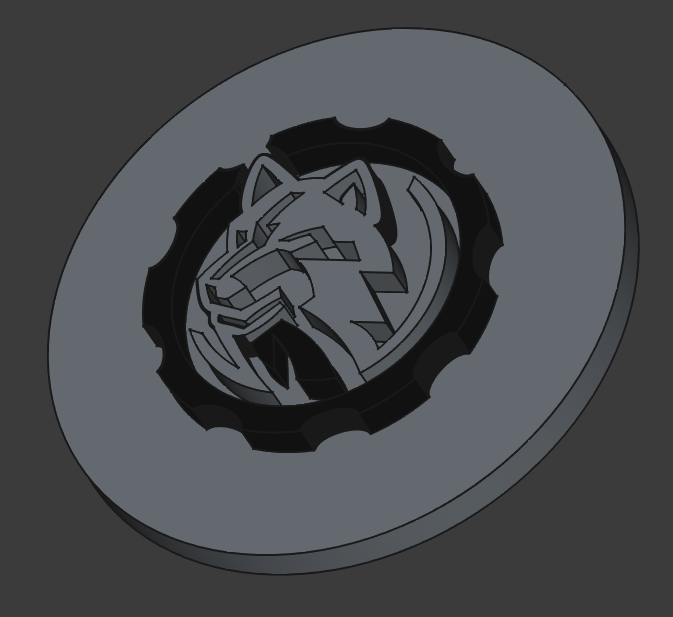
Day 4: 3D Printed Stamp
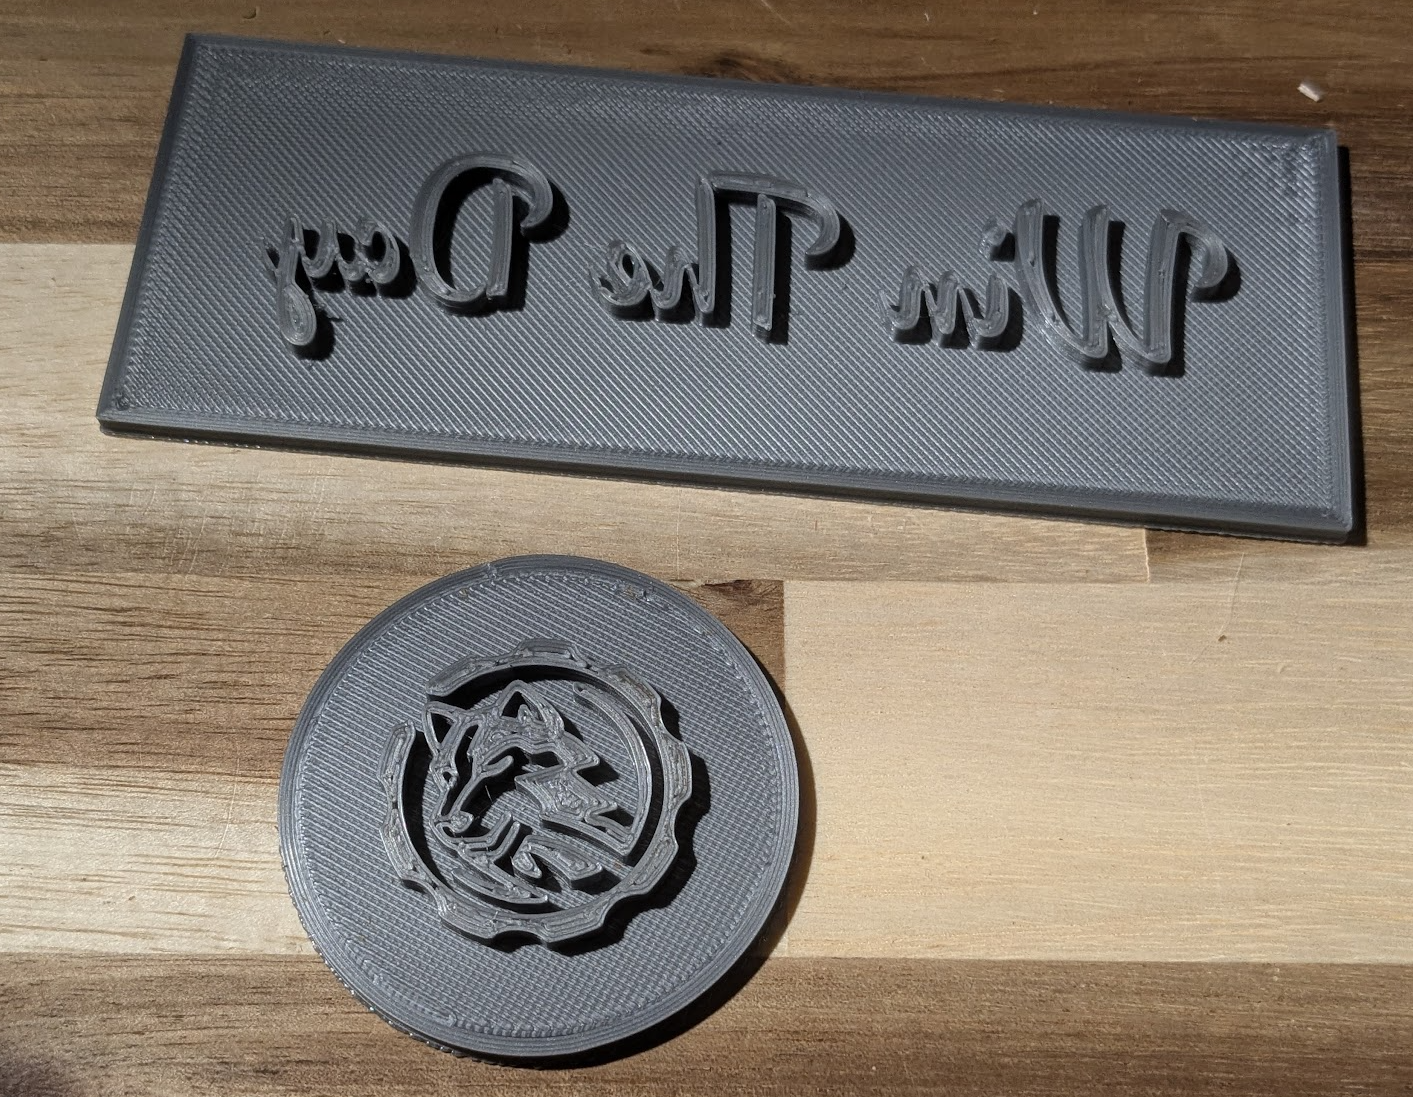
On day four, I took my logo and turned it into a 3D printed stamp that can be used to stamp leather.
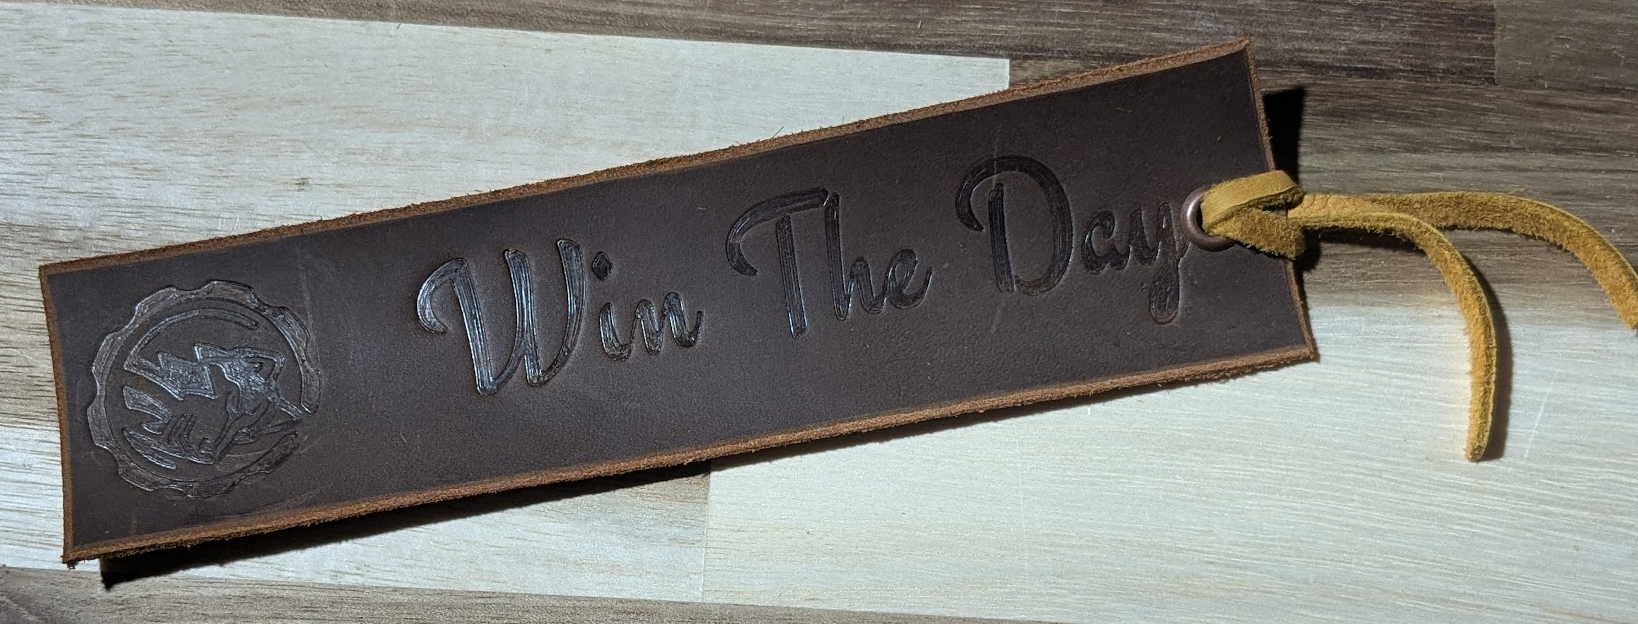
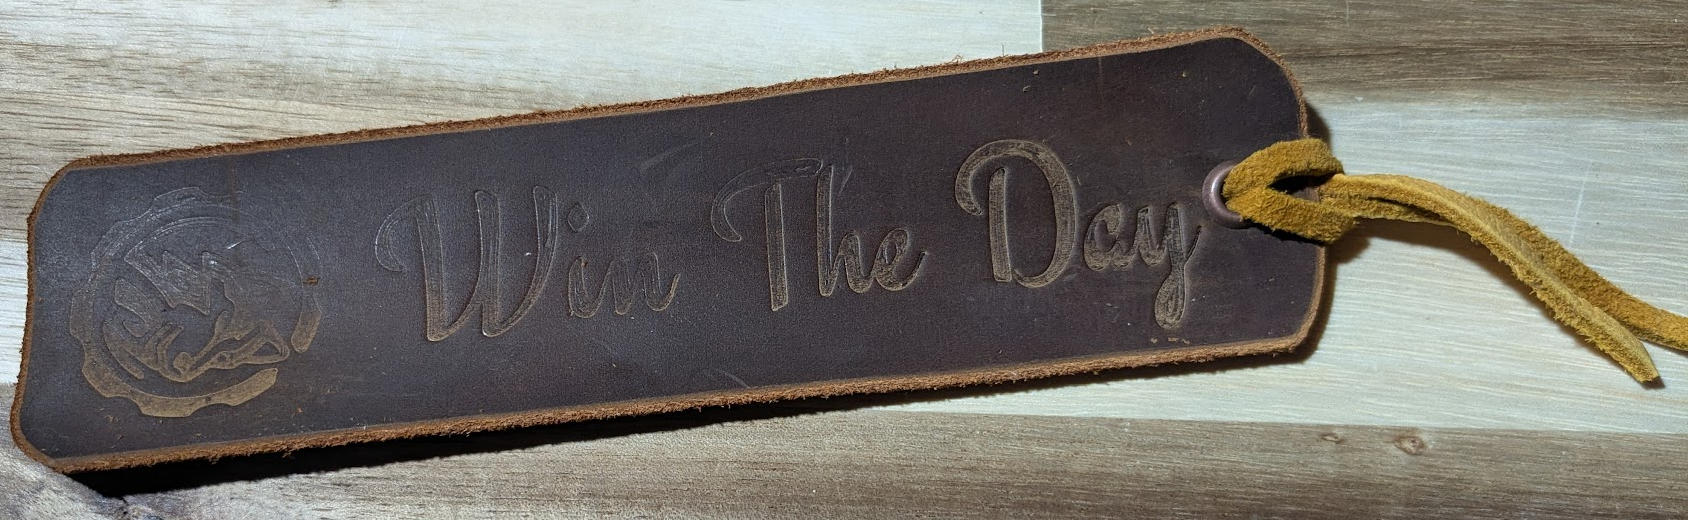
Day 5: Stamped Bookmark
For day 5, I cut a piece of leather for use as a bookmark, and applied the stamp from day four.
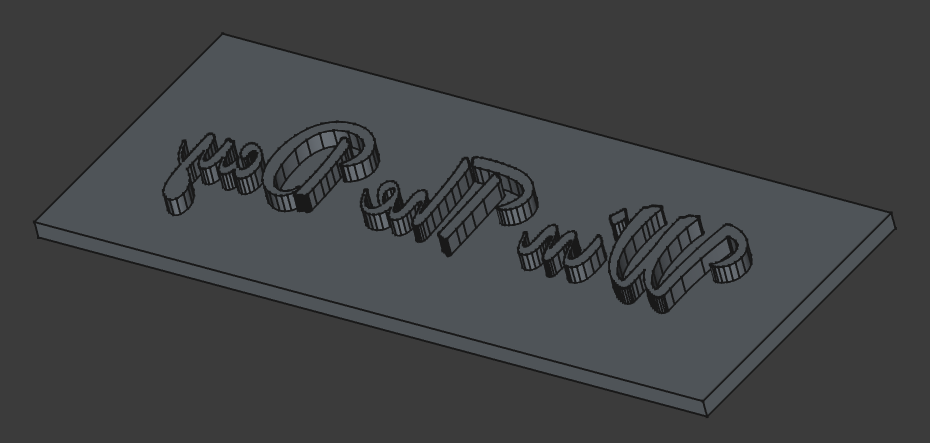
Day 6: 3D Printed Pattern
The project for day six was to make a reusable 3D printed template for a leatherworking pattern. My original plan was to use one of the wallet patterns that I had purchased from Etsy, but I kinda like how the bookmark turned out, so I decided to make a template for that instead.
A little bit of cheating in terms of complexity, but I think personalized leather bookmarks are a good first product for my store. Not only is it something simple to start with, but it's a product I can make out of scrap pieces of leather that are too small for anything else.

Day 7: Apply the pattern
On day seven, I used the printed pattern from day 6 to cut, stamp, and create one more bookmark - this time with rounded corners. Now I have something more refined to use than random business cards when starting my next book 😆
Takeaways
Overall, not a bad start to the challenge. A couple things to note going forward though:
- See if resin 3D Prints work better than FDM for stamping. Some areas don't look as good, potentially from the "rough" print surface?
- See about getting an actual press instead of using clamps to help improve consistency when stamping.
- I need better lighting in my leather area!